 Install & Use
In order to use your font, you need to install it. Installing a font makes the font available to all applications (including but not limited to most word processing, spreadsheets, desktop publishing and graphic design programs like Microsoft Word, Adobe Illustrator, etc.) on your computer.
The easiest and most convenient way to install your fonts is to use a font manager. If you don't have a font manager, do follow the instructions below.
Note: Some programs require a restart for the new font to be available.
Windows (7, 8, 8.1, and 10) font installation instructions
- Double-click your font file
- Click the Install button
Windows (Vista, XP, 2000, Me, 98, 95) font installation instructions
- Open "Control Panel" (under Start->Settings)
- Double-click "Fonts" category
- Select "Install New Font..." from File menu
- Browse to the location you placed the font file
- Select "Your font (TrueType)" from the window
- Click the Ok button
Note: If you are reinstalling the font, it is recommended you uninstall and delete the font BEFORE installing the new version. Sometimes a reboot is required as well.
Macintosh font installation instructions (Mac OS X)
- Locate your font file in the Finder
- Double-click the font file icon
- Font Book should display the font
- Click the Install button
Note: In order to make use of the newly installed font, some applications require you to reboot your Mac.
Linux font installation instructions
- Find out the default font installation directory (usually /usr/share/fonts/truetype/)
- Copy the font file to that directory
- Rebuild the font folder index
- Update the font cache (e.g. fc-cache)
Note: Some of the above instructions may require root privileges. Font installation may vary per Linux distribution.
Getting Started
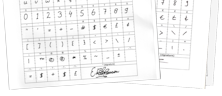
 Print Template
 Complete Template
 Scan & Save Template
 Upload Template
 Preview Your Font
 Download
Subscribe to our newsletter or follow us on Twitter. Once or twice a year we'll send you a discount coupon, so join now!
| User Quotes (view all quotes) |
“Second time I use this website to create my own font. The first time I came here (back in 2021) I wasn't sure it would really work. But what a relieve (and joy) when I saw that it really worked! The first time, I was so eager to create my own font (useless font for someone else than me haha) that I didn't take the time to do it properly, the result was imperfect, but I was glad because I could...” [more] NaiikenOctober 5, 2024 |